Getting To Know: Wax Poetic Creations

Creating Wax Poetic Creations was a no brainer for Alexandra. Starting out as a way to fill her creative drive, making candles has blossomed into a career.

To finally find my niche was so empowering. Over the next few months I explored the local artisan community and decided it was something I’d love to be a part of. Entrepreneurship runs in the family, and it snuck up on me. Before I knew it, Wax Poetic Creations was born.

Made from soy wax with lead-free wicks, Alexandra’s light scented candles are born out of seasonal inspiration- from citrus scents during the Summer and more sweet smells come Winter.

I take in a lot of recommendations from customers and decide what scents will be best received by others as well. One scent is available all year round, because it’s such a hit. It’s called Unwind, an essential oil blend of Bergamot, Neroli, and Mandarin.

There are a number of combinations of wax, wick and scents that can be chosen to create the perfect candle. Alexandra says she always chooses higher quality products to most importantly, support local businesses.

I believe that Wax Poetic candles should meet my own standards and values. Soy wax burns longer, burns cleaner, is environmentally friendly and is made in North America and even needs to be FDA approved. Paraffin wax, on the other hand, releases toxins into the air, burns faster, and is made from crude oil. Soy wax is made from the earth, and is biodegradable as well. Can’t go wrong with that! As for wicks, many candles use lead-core wicks. These have been known to release the lead back into the air as the candle burns. The materials I use do not release carcinogens. They instead are clean burning and longer lasting than the alternative!

For Wax Poetic Creations, small scaled, artisan production is the way to go. Alexandra says while the process can be challenging, it is very rewarding when she sees a customer’s satisfaction.

Smaller scaled production allows each candle to get the same attention. I can customize a single candle, change one’s colour, or alter its scent. To make candles, I spend hours dedicated to melting down the wax in small sets, pouring six candles or so at a time, and then individually designing, printing and placing labels. When all is said and done, I have completed each candle as a one-woman show. All sales support my ability to make more and continue with my passion.

Wax Poetic Creations has one of the most simple and elegant logos. Created by her sister Natalia, Alexandra says she wanted to get to the core of what makes a good candle so she literally turned to the element for inspiration.

The simple candle flame reflects on the simplicity of a soy candle. As my inspiration changes, I am slowly allowing my logo to adapt and become more simple, but the flame and wick will stay the same.

Alexandra has recently changed her focus to summer farmers markets and to continue to build her brand, giving her more opportunities to become further involved in the community.

 In addition, Wax Poetic is soon to be a part of a new subscription box, some brick and mortar stores, and more! Near future goals include a summer full of events and markets, as well as my new home candle making classes that can be booked on my website.
On The Wild Side With: The Raw Guy

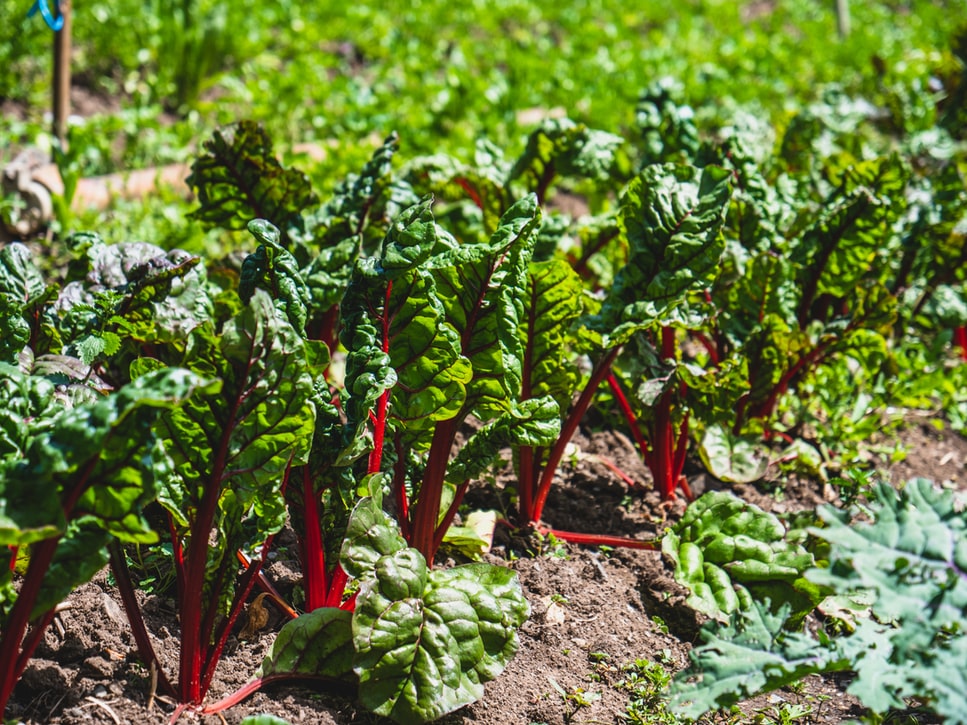
Kale is one of those vegetables that some would like to not include in their diet but what we can all agree on is its nutritiousness.

Kale is a super food, so a great source of Vitamins A, B6, C, K, Calcium, Potassium, Copper Manganese, Iron, and fiber. The list goes on and on. We could write a book and some have.

Brian, “The Raw Guy” has created a product that takes an unconventional approach to consuming kale, enticing more people to enjoy the benefits of having a healthy snack option.

The foods that I offer at market are “Transitional Food”. Foods that have a familiar look, taste and mouth feel to the foods most of us are used to. This helps us move into a more raw plant based way of eating without feeling deprived. So these are flavours you would see in any chip out there and yes maybe a couple you wouldn’t.

Brian has taken his own raw food diet experience and desire to share this with others to create a range of uniquely flavoured kale chips, further inspired by his customers and own desire to fuse different food together.

So when I heard some talking on raw food a light went on and I’ve been following the light since then….It’s more a desire to share the power of food as a medicine.

Raw organic food leaves the nutritional profile of the food in tacked as nature intended. Brian says this means maximizing the nutritional value with the least amount of bodily energy expended and this concept is carried over into his products as well.

All this in order to maximize our health while having a yummy taste treat. There are exceptions naturally, but if you’re looking to optimize your health a diet high in raw plants is an impressive way to go.

Kale can grow almost all year in the Lower Mainland. Brian says it’s a hardy plant, not requiring perfect soil conditions or copious amounts of sunlight.

It’s one tough customer, but delivers a ton of nutrition. Go figure.

Fun Fact: Did you know a serving of kale has more Vitamin C than an orange?

Now you know! 

Getting To Know: West Coast Chipwich

(Courtesy of West Coast Chipwich)

So what is a chipwich?

A chipwich is a handmade artisan ice cream sandwich. The name chipwich coming from the Chocolate CHIP cookies, the wich from the sandWICH

West Coast Chipwich’s Dave Roberts has always been a cookie fan but wanted to create a delicious twist on the classic treat, ice cream sandwiches.

Ice cream and cookies whats not to like right? But is always seemed so boring with the  tasteless wafer like chocolate cookie and plain vanilla ice cream that you always associate with.

After recently moving back to Canada after living in the United States for a couple of years, Dave began experimenting with flavours, and with much success among friends, he decided to take his creation to the next level: building a business.

I saw the amazing artisan ice cream shops around Vancouver and BC, I thought here is an area that needs some awesome chipwichs!!

Sourcing local and supporting other small local businesses are very important to Dave. Taking “local” to another level, the cookies that form the chipwich are all baked by Dave himself.

I actually bake all my own cookies as they are not your traditional treats. My cookies use different sugars, molasses and cooking methods to make sure that they are not too sweet and also don’t turn rock hard when frozen.

(Courtesy of West Coast Chipwich)

In line with West Coast Chipwich’s commitment to local businesses, the company’s ice cream is BC made, from the raw dairy to the production.

The most important part for me was that the company was local and used BC dairy. I think that this is important not only to the taste but also to my vision to support and source local. One day I hope to make my own ice cream!

Dave is always ready to create and try out new flavours combinations.

There are so many subtle changes that can be made in the cookie recipe, cook times and temperatures that can change not only the taste but the texture and sweetness levels as well. Once I have a  combination of cookie and ice cream that’s when the real experimentation begins!

To ensure the highest quality product, Dave cuts no corners, baking and assembling all products by hand. From weddings, and birthdays, to employee appreciation, West Coast Chipwich has all your catering needs covered!

…or just to be the awesome guy in the neighborhood I am available for your next event! Over the next six months I want to put my delicious product into the hands of as many of my BC neighbors as possible. I am confident that everyone who tries my product will love it. 

Only in his first year of business, Dave is ready to continue to grow his company and challenge himself, even looking to future labour expansions.

On The Wild Side With: Oyster & King

(Courtesy of Oyster & King)

Did you know cultivated mushrooms are grown differently than other produce? Most are apart of a group of fungi called, saprobes, which feed off of and lie within decaying organic materials such as wood and straw, not soil. Coming this summer, customers of the farmers market will have the chance to purchase mushrooms grown from a unique blend of such materials thanks to Oyster and King!

Our mushrooms are grown on our unique substrate combination of wood chips and other organic materials and are delivered locally daily to guarantee freshness and quality.

(Courtesy of Oyster & King)

David Xiao of Oyster King says to grow mushrooms, carbon is derived from wood or straw, but accessible nitrogen is usually added in the form of bran, composted animal manure, or other means.

It is an labour intensive process in strictly controlled environment that is
by default organic, and sustainable operations operate much like a factory rather than a farm.

Mushroom growth is dependent on a maintenance of a narrow range of C/N ratio (for fertile compost), pH, temperature, and humidity.

David says oyster mushrooms grow at an ideal temperature of 10-24°C, making the spring and fall seasons the ideal time of year to grow.

Wild mushrooms have unique requirements for fruiting, and fruit throughout various times of the year. Morels pop in the late spring and summer, and chanterelles, lobsters and others come with the early rains of the fall wherever it is moist.

Fun fact: Did you know fungi were among the first organisms to colonize land beside plants? There is speculation that they had an early symbiosis with plants and this aided them in doing so.

Now you know!

Getting To Know: Royal City Donuts

(Courtesy of Royal City Donuts)

Calling all donut lovers! The much anticipated, Royal City Donuts will be participating in the Coquitlam Farmers Market this season. But before digging in, here’s some more information about who they are and what their products are all about.

Jonathan and his wife, along with their team of fellow donut lovers want customers to experience the balance of unique ingredients that are put into each batch of their donuts.

I want them [customers] to think they are getting more than they expected in terms of flavour and quality.

Royal City Donuts has strived to bring a European style treat, made by hand with care and quality ingredients into the local market. With an expanding team and an eye for food trends, we can expect new things from the company.

My wife has contributed greatly, and now with two members joining the team we are starting to forecast a month in advance with ideas to play with. The trends in the food scene are also very influential with sweet and savoury being so predominant.

(Courtesy of Royal City Donuts)

Continuously forecasting a month in advance, Jonathan says himself and his team are always mindful to balance new blends of interesting flavours while still maintaining the integrity of the donut.

Once you do a few markets or pop ups in the same place you want to keep things interesting and give people a reason to check you out again and again.

With excitement building around the company, Jonathan says Royal City Donuts will concentrate on summer markets for now, but talks about what’s next for the company are already in the works.

We would love to have our own, industrial space where we can do higher production for breweries, coffee shops, corporate and large scale orders while having a small store front where people can get their fix.

Royal City Donuts already has a supply partnership with Hive Cafe in New Westminster and customers can expect continued creativity with their donuts.

Getting to Know: Jerk Store

As a new business it is a great way to get feedback on my products. You also learn to many things from other vendors who have been in the same position.

As many have come to realize this season, the Coquitlam Farmers Market is known not only for its produce, but its great prepared food and the products coming from Jerk Store are no exception!

Jerk Store offers a unique blend of flavours with their handcrafted artisan jerky, from French Onion Soup to Chimichurri! Made with 100% all natural ingredients owner Khal and his team go from slicing the beef, marinating it overnight, to packaging all in Port Moody.

We use premium B.C. Beef that is free of hormones and antibiotics.

And a surprise to many?

That we make tofu jerky! People seem to automatically associate us with meat products and several have been pleasantly surprised when they discover we have non-meat options.

The number one question Khal asks himself while creating his product is, “is this something I would want to eat?” He says the first step for those who are hesitant on buying locally produced food is to simply trying the product.

Discover what food is supposed to taste like. The mass produced food system is unsustainable and making people and the planet sick.

Khal says farmers market help raise awareness of how to produce real food in addition to supporting the local economy and community.

It is only going to grow as more people open their eyes and realize that supporting local is a more sustainable and healthy way of living.

Fresh Eats Blog: Potatoes

Here at the Coquitlam Farmers Market we are all about local, seasonal and sustainably grown produce. What better way to celebrate the summer months than a fresh take on some familiar foods! This week’s topic: potatoes.

Did you know potatoes are one of the world’s most important staples? From 1845 to 1852, Ireland experienced a great famine due to the shortage of potatoes, killing about one million people.

Did You Know?

Did you know many compare potatoes to pasta or bread because of the amount of carbohydrates it contains? There are thousands of different varieties of potatoes, all pollinated by bees!

Despite the name, did you know sweet potatoes are only loosely related to potatoes?

Potatoes are in season in South West British Columbia from August until sold out the next year! Make sure you stop by the market this Sunday to try some of the province’s best!

Recipe of the Week

Salad- Stuffed Tomatoes 

Courtesy of MARTHA STEWART LIVING

Ingredients:

3 red potatoes
Salt and freshly ground pepper
4 large tomatoes
1 teaspoon Dijon mustard
2 tablespoons red-wine vinegar
1 tablespoon freshly squeezed lemon juice (1/2 lemon)
3 tablespoons olive oil
1 cucumber, seeded and cut into 1 1/2-inch-long matchsticks
1/2 bunch arugula (1 1/3 cups), cut into thin strips
4 onions, peeled and cut into thin rounds

Directions:

Step 1- Place potatoes in a small saucepan; cover with salted water. Bring water to a boil, and cook potatoes until fork tender, 12 to 15 minutes. Remove pan from heat, and transfer potatoes to an ice-water bath until cool.

Step 2- Drain potatoes, and slice into 1 1/2-inch-long matchsticks; set aside.

Step 3- Slice off the tops of tomatoes; discard tops. Using a melon baller, scoop out the seeds and flesh; discard. Set the tomato “bowls” aside.

Step 4- In a small bowl, whisk together mustard, vinegar, and lemon juice. Season with salt and pepper. Slowly whisk in oil. Set vinaigrette aside.

Step 5- In a medium bowl, combine potatoes, cucumber, arugula, and onions. Add reserved vinaigrette; toss gently to combine. Divide salad among tomato bowls, and garnish with dill fronds, if available.

Ingredients at the Market

Cucumbers: Forstbauer Farms, Nutrigreens, Ripple Creek Organic Farm, Wah Fung Farm

Potatoes: Forstbauer Farms, Shen’s Farm, Never Say Die

Tomatoes: Forstbauer Farms, Never Say Die, Ripple Creek Organic Farm

Arugula: Langley Organic Growers

Onions: Ripple Creek Organic Farm

Butter & Cheese: Golden Ears Cheescrafters

Other Greens and Vegetables: Floralia Growers, Forstbauer Farms, Langley Organic Growers, Never Say Die Farm, Ripple Creek Organic Farm, Shen’s Farm, Wah Fung Farm

Steps on How To Grow

Potato Planting 101:

Step 1- Plant seeds or small portions of pre-cut potatoes in nutrient rich soil. If you are planting pre-cut pieces of potatoes, make sure you cut them about one day before in order to give it time to form a protective layer prior to planting.

Step 2- Form a trench and then spread and mix in rotted manure or organic compost in the bottom.

Step 3- Plant seed potatoes one foot apart in a 4-inch deep trench, eye side up.

Note: It is recommended to practice yearly crop rotation.

Step 4- Make sure you water your plants regularly. This is especially important when the tubers are forming. Potatoes like growing in soft soil that can be drained well.

Step 5- When the plant is about six inches tall, hoe the dirt up around the base of the plant in order to cover the root as well as to support the plant. Bury them in loose soil. This ensures the crop does not get sunburnt.

Note: If you see your potatoes have turned green, this is a result of them being sunburnt. Do not eat them!

Step 6- Repeat step 5 every few weeks to protect your crop.

Step 7- The time of harvest depends on what time of year you have planted. Harvest could occur between 60 to 90 days after planting.

Step 8- Harvest your crop after the plant’s foliage has died back. Cut browning foliage to the ground and wait 10 to 14 days before harvesting to allow the potatoes to develop a thick enough skin. Don’t wait too long, though, or the potatoes may rot.

Step 9- Dig potatoes on a dry day. Dig up gently, being careful not to puncture the tubers.

Potatoes in B.C.

Did you know potatoes make up 52% of all fresh vegetables consumed in Canada? Canada is among the top 20 potato producing countries worldwide and is the most valuable vegetable crop in Canada.

Potatoes are grown in every province including B.C.! Although not one of the main producers, there are dozens of farmers who produce this crop! As a country, we produce about $1 billion worth of potatoes annually.

Getting to Know: Rockweld Farm

Rockweld Farm is all about fresh, local and natural foods! Owners and operators Tim and Flo Rempel raise small flocks of 600 to 1,500 chickens across one and a half acres on their Abbotsford farm.

Our chicken and eggs are Certified Organic fed, BCSPCA Certified, and raised without any medication.

The Rempels have been apart of farmers markets for many years and love being able to bring their products closer to many consumers homes’.

We attend farmers markets to get more of our product out to the
consumer and not have to wholesale – no middle person! Farmers market people are great and loyal customers.

In addition to chicken and eggs that Rockweld is known for, you can also find 100% chicken sausages; raw and smoked, gluten free and sodium nitrite free.

…And all of our sausage casings are made from seaweed and they taste great!

Rockweld Farm stemmed from the Rempels desire to grow better tasting, humanely raised chicken and eggs.

We can provide our customers fresh, local, good food. All of our
products direct to the consumer, at our farm store in Abbotsford and at farmers markets.

Fresh Eats Blog: Garlic

Here at the Coquitlam Farmers Market we are all about local, seasonal and sustainably grown produce. What better way to celebrate the summer months than a fresh take on some familiar foods! This week’s topic: garlic.

Did You Know?

Although garlic is native to central Asia, did you know China is currently its largest producer?

Each bulb of garlic contains many nutrients, including potassium, iron, calcium, and Vitamin C.

Garlics’ health benefits date back centuries and is believed the help reduce cholesterol and blood pressure!

The end Garlic’s growing season in South West British Columbia ends in October but can be stored for months after harvest! Make sure you stop by the market this Sunday to try some of the province’s best!

Recipe of the Week

Roasted-Garlic Bread

Courtesy of MARTHA STEWART LIVING

Ingredients:

1/2 cup Roasted Garlic
1 tablespoon cooking oil
Coarse salt and ground pepper
1 loaf rustic French or Italian bread

Directions:

Step 1- Preheat oven to 400 degrees. In a small bowl, mash roasted garlic and cooking oil to a coarse paste with a fork.

Step 2- Split bread horizontally and spread garlic paste evenly on cut sides. Season generously with salt and pepper.

Step 3- Place bread on a rimmed baking sheet and bake until garlic is golden and edges of bread are crisp, 20 to 25 minutes.

Step 4- Cut into wedges for serving.

Roasted- Garlic Mashed Potatoes

Courtesy of MARTHA STEWART LIVING 

Ingredients:

2 heads garlic
1 teaspoon olive oil
3 pounds potatoes, scrubbed and cut into 1-inch cubes
Coarse salt and ground pepper
1 cup half-and-half
4 tablespoons butter

Directions: 

Step 1- Preheat oven to 400 degrees. Cut off and discard top quarter of garlic heads. Drizzle garlic with oil; wrap in foil. Bake until tender, 1 hour. Squeeze out garlic cloves; discard skins.

Step 2- Place potatoes in a large saucepan, and cover with cold water by 1 inch; season with salt. Bring to a boil; reduce to a simmer. Cook until potatoes are easily pierced with a paring knife, 15 to 20 minutes.

Step 3- Drain, and return to pan. Heat over medium, stirring, until a thin starchy film covers bottom of pan. Remove from heat; add half-and-half, butter, and garlic. Mash until smooth; season with salt and pepper.

Ingredients at the Market

Garlic: Ripple Creek Organic Farm, Forstbauer Farm

Potatoes: Forstbauer Farms

Bread: A Bread Affair

Other Greens and Vegetables:  Forstbauer Farms, Ripple Creek Organic Farm, From Beds to Bowls Farm

Steps on How To Grow

Garlic Planting 101:

Step 1- It is recommended to grow garlic in the fall but it can be planted in early spring. A few days before you plant, break apart the cloves from its bulb but do not remove the husks.

Note: It is not recommended that you plant from store bought bulbs. Make sure you buy from a local nursery or farmers market and choose a variety that suits your growing environment.

Step 2- Make sure the space you have chosen to plant is well-drained with plenty of organic matter. If not you may choose to add organic fertilizer or mulch. Also, ensure the place where you are going is sunny.

Note: If you notice the leaves of your plants have a yellow hue, add fertilizer.

Step 3- Place cloves 4 inches apart and 2 inches deep, in their upright position. Make sure the wide root side facing down and pointed end facing up.

Step 4- During the colder, frost months, add a heavy amount of mulch. Water about 3-5 days during warmer months.

Step 5- Once you see the tip of your plants have a yellow colour and they begin to fall, it is time to harvest. Another indicator is the leaves drying out.

Note: Ensure you do not harvest too early. You want to make sure your bulb is a mature size and the wrapping quality is good.

Step 6- Carefully lift the bulbs with a spade or garden fork. Pull the plants, carefully brush off the soil, and let them cure in an airy, shady spot for two weeks. Then hang them upside down on a string in bunches of four to six.

Garlic in B.C.

B.C.’s climate is perfect for growing garlic! Dozens of local farmers produce this easy to grow crop.

To note: There many types of garlic.  But the 2 main categories are soft neck and hardneck.

In BC, hardneck is the most common category, as it is planted in October and is harvested in July.  What is great about this kind as it produces a delicious edible scape in June to be snatched off and eaten!

Soft neck can be planted here, but it is usually the type purchased in a local grocery store.  But, planting softneck garlic can give you the ability to create garlic braids!  Yes!  So pick your type to grow and have fun!


Fresh Eats Blog: Butternut Squash

Here at the Coquitlam Farmers Market we are all about local, seasonal and sustainably grown produce. What better way to celebrate the summer months than a fresh take on some familiar foods! This week’s topic: butternut squash.

Did You Know?

Butternut squash is one of the most popular winter squashes? Did you know one butternut squash generally contains 354% of your daily need for Vitamin A- that is more than a pumpkin!

This low calorie squash has many vital poly-phenolic anti-oxidants and vitamins. Just one serving has only 45 calories! Make sure you stop by the market this Sunday to try some of the province’s best!

Recipe of the Week

Roasted Squash with Cherry Tomatoes and Eggs

Courtesy of MARTHA STEWART LIVING

Ingredients:

2 small butternut or acorn squashes (no larger than 1 1/4 to 1 1/2 pounds each), halved lengthwise and seeded
2 tablespoons extra-virgin olive oil
Kosher salt and freshly ground pepper
1 teaspoon fresh thyme leaves, plus 6 sprigs
2 cups cherry tomatoes (11 ounces), stem-on, if desired
2 teaspoons chile paste, such as sambal oelek, plus more for serving
4 large eggs

Directions:

Step 1- Preheat oven to 425 degrees with racks in upper and lower thirds. Line 2 baking sheets with foil. Rub squashes all over with 1 tablespoon oil. Season with salt and thyme leaves, then place, cut-sides down, on a baking sheet. Add thyme sprigs. Place on upper rack; roast 10 minutes.

Step 2- Meanwhile, toss tomatoes in remaining 1 tablespoon oil; season with salt. Spread on second sheet in a single layer. Place on lower rack; roast until tomatoes are beginning to collapse and squashes are tender, 20 to 25 minutes more.

Step 3- Remove tomatoes. Turn squashes cut-sides up and roast 5 minutes more. If hollows in squashes are large enough, spoon a tomato or two into each. Spoon 1/2 teaspoon chile paste into each hollow, then crack an egg into each; season with salt.

Step 4- Bake until whites are set but still a bit wobbly and yolks are soft, 12 to 15 minutes. (Start checking for doneness at early end of range, removing squashes with cooked eggs as they’re done.)

Step 5- Let stand 3 minutes, then serve, with more chile paste and roasted tomatoes, and seasoned with pepper.

Ingredients at the Market

Butternut squash: Forstbauer Family Farm, Langley Organic Growers, Red Barn Plants and Produce

Thyme: Red Barn Plants and Produce

Cherry tomatoes: Ripple Creek Farm, Red Barn Plants and Produce, Never Say Die Farm

Butter: Golden Ears Cheescrafters

Eggs: Rockweld Farm, Central Park Farm

Other Greens and Vegetables:  Floralia Growers, Forstbauer Farms, Langley Organic Growers, Never Say Die Farm, Ripple Creek Organic Farm, Shen’s Farm, Wah Fung Farm

Steps on How To Grow

Butternut Squash Planting 101:

Step 1- Make sure you are not planting during cooler months. Butternut squash seeds are very susceptible to frost so ensure your soil is warm for germination.

Step 2- Since it is a vining vegetable, plant your seeds in soil that is on an incline (generally a hill and at about 18 inches high).

Step 3- Make sure your soil has plenty of nutrients because butternut squash are heavy feeders. This may require organic fertilizer.

Step 4- Plant five or six seeds per hill about four inches apart and one inch deep. Water regularly but ensure the ground is not soggy.

Step 5- After about ten days, the seeds will sprout. When they’re about six inches high, thin out the weakest leaving three plants per hill.

Note: Fruit maturation for this plant is about three to four months so if your growing season is short, it is recommended that you begin growing indoors.

Step 6- If planting indoors, make sure you have nutrient rich soil and place your pot in either a sunny window or greenhouse. Transplant to the garden after all danger of frost is past.

Note: Harden off the seedlings before transplanting.

Step 7- When cultivating your crop, make sure not to push down too deep because this squashs’ roots are shallow. Harvest when the skin turns hard and is difficult to pierce with your thumbnail.

Butternut Squash in B.C.

It is reported that the origin of butternut squash began around 1940 in Massachusetts. Despite this early beginning, squash in general have been eaten for hundreds of years!

While Quebec and Ontario are the two main squash producers in Canada, B.C. has dozens of farmers who produce seasonally. Interest in squash has been on the rise in recent decades but it still has low commercial value for the country.

Did you know there are now more than 6,500 hectares of land planted with squash every year worth more than $40 million?